-
本文归属于iOS 动画(从API调用到微机原理) ,iOS 动画(从API调用到微机原理) 顺序进行阅读。
本文目录:
1
2
3
4
5
6
7
8
9
10
11
12
13
14
15
16
17
18
19
20
21
22
23
24
25
26
27
28
29
30
31
32
33
34
## 一、UIView 实现动画效果 ### (一)UIViewAnimation #### 1. setAnimationsEnabled #### 2. performWithoutAnimation: ### (二)UIViewAnimationWithBlocks #### 1. animateWithDuration: #### 2. transitionWithView: #### 3. transitionFromView: #### 4. performSystemAnimation #### 5. modifyAnimationsWithRepeatCount ### (三)UIViewKeyframeAnimations ## 二、CoreAnimation 实现动画效果 ### 1. CAAnimation ### 2. CAPropertyAnimation : CAAnimation ### 3. CABasicAnimation : CAPropertyAnimation : CAAnimation ### 4. CAKeyframeAnimation : CAPropertyAnimation ### 5. CASpringAnimation : CABasicAnimation ### 6. CATransition : CAAnimation ### 7. CAAnimationGroup : CAAnimation ## 三、UIViewPropertyAnimator 交互动画 ## 四、使用 Core Graphics 实现自定义View ### (一)制作流程 ### (二)实操步骤 ## 五、自定义动画 ### (一)在UIView上实现 ### (二)更优雅的实现方式:在CALayer上实现
一、UIView 实现动画效果 通过查看系统提供的 UIView.h 文件,我们可以发现 UIView 中关于 动画animation 的 Category 主要有三类,接口如下:
(一)UIViewAnimation 1 2 3 4 5 6 7 8 @interface UIView(UIViewAnimation) + (void)setAnimationsEnabled:(BOOL)enabled; @property(class, nonatomic, readonly) BOOL areAnimationsEnabled; + (void)performWithoutAnimation:(void (NS_NOESCAPE ^)(void))actionsWithoutAnimation API_AVAILABLE(ios(7.0)); @property(class, nonatomic, readonly) NSTimeInterval inheritedAnimationDuration API_AVAILABLE(ios(9.0)); @end
1. setAnimationsEnabled 如果将 setAnimationsEnabled: 设置为NO,那么给 UIView 添加的所有动画将都不生效。
performWithoutAnimation: 使用的频率非常高,它会将 block 中执行的方法动画禁止掉,常来解决如下几类问题:
tableView/collectionView reload/insert/delete 的闪烁问题
屏蔽隐式动画,比如:[self.tableView setContentOffset:CGPointMake(0, 100) animated:NO];
(二)UIViewAnimationWithBlocks 1 2 3 4 5 6 7 8 9 10 11 12 13 14 15 16 17 18 19 @interface UIView(UIViewAnimationWithBlocks) + (void)animateWithDuration:(NSTimeInterval)duration delay:(NSTimeInterval)delay options:(UIViewAnimationOptions)options animations:(void (^)(void))animations completion:(void (^ __nullable)(BOOL finished))completion API_AVAILABLE(ios(4.0)); + (void)animateWithDuration:(NSTimeInterval)duration animations:(void (^)(void))animations completion:(void (^ __nullable)(BOOL finished))completion API_AVAILABLE(ios(4.0)); // delay = 0.0, options = 0 + (void)animateWithDuration:(NSTimeInterval)duration animations:(void (^)(void))animations API_AVAILABLE(ios(4.0)); // delay = 0.0, options = 0, completion = NULL + (void)animateWithDuration:(NSTimeInterval)duration delay:(NSTimeInterval)delay usingSpringWithDamping:(CGFloat)dampingRatio initialSpringVelocity:(CGFloat)velocity options:(UIViewAnimationOptions)options animations:(void (^)(void))animations completion:(void (^ __nullable)(BOOL finished))completion API_AVAILABLE(ios(7.0)); + (void)transitionWithView:(UIView *)view duration:(NSTimeInterval)duration options:(UIViewAnimationOptions)options animations:(void (^ __nullable)(void))animations completion:(void (^ __nullable)(BOOL finished))completion API_AVAILABLE(ios(4.0)); + (void)transitionFromView:(UIView *)fromView toView:(UIView *)toView duration:(NSTimeInterval)duration options:(UIViewAnimationOptions)options completion:(void (^ __nullable)(BOOL finished))completion API_AVAILABLE(ios(4.0)); // toView added to fromView.superview, fromView removed from its superview + (void)performSystemAnimation:(UISystemAnimation)animation onViews:(NSArray<__kindof UIView *> *)views options:(UIViewAnimationOptions)options animations:(void (^ __nullable)(void))parallelAnimations completion:(void (^ __nullable)(BOOL finished))completion API_AVAILABLE(ios(7.0)); + (void)modifyAnimationsWithRepeatCount:(CGFloat)count autoreverses:(BOOL)autoreverses animations:(void(NS_NOESCAPE ^)(void))animations API_AVAILABLE(ios(12.0),tvos(12.0)); @end
1. animateWithDuration: 这个接口使用得频率非常高,这里就不做太多的介绍了。
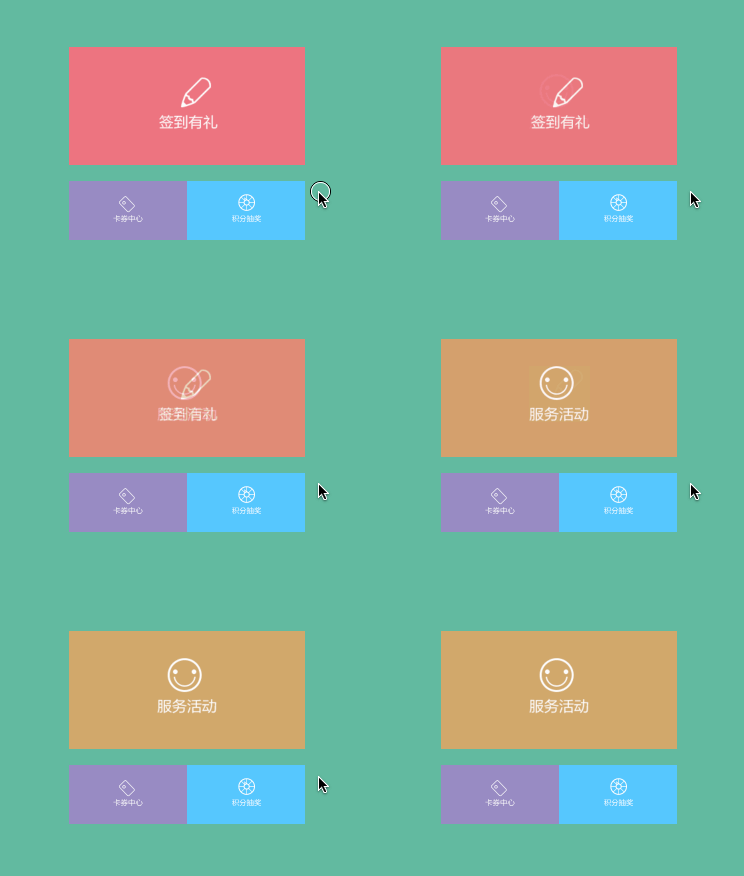
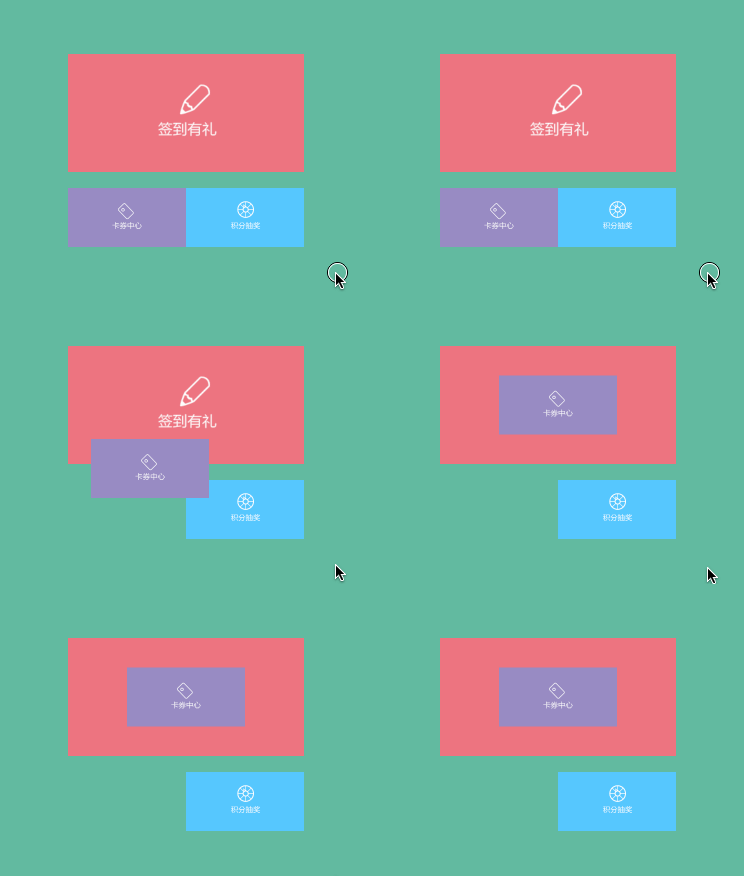
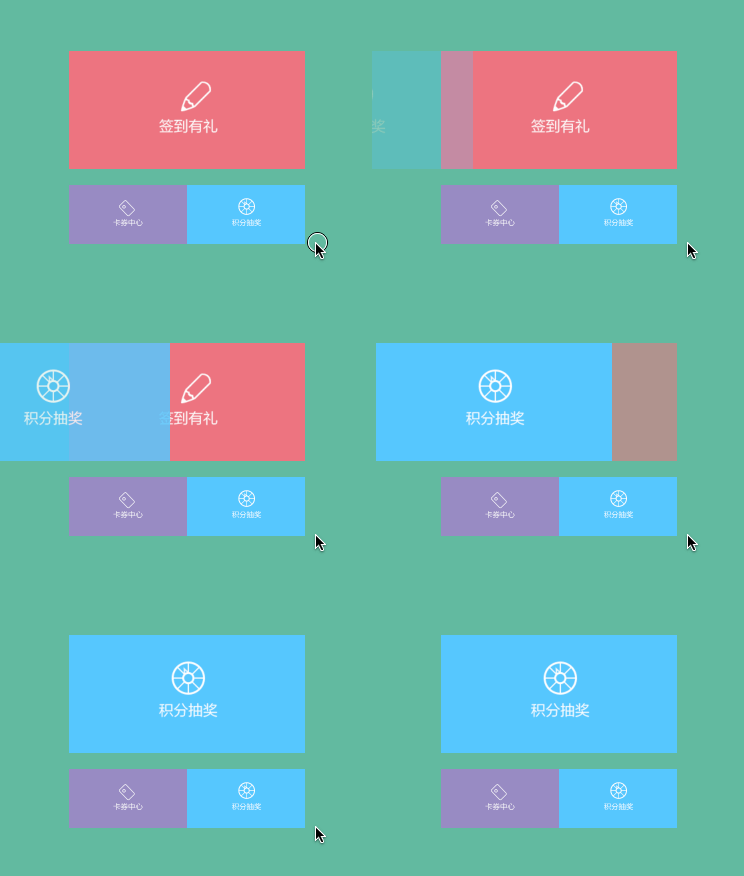
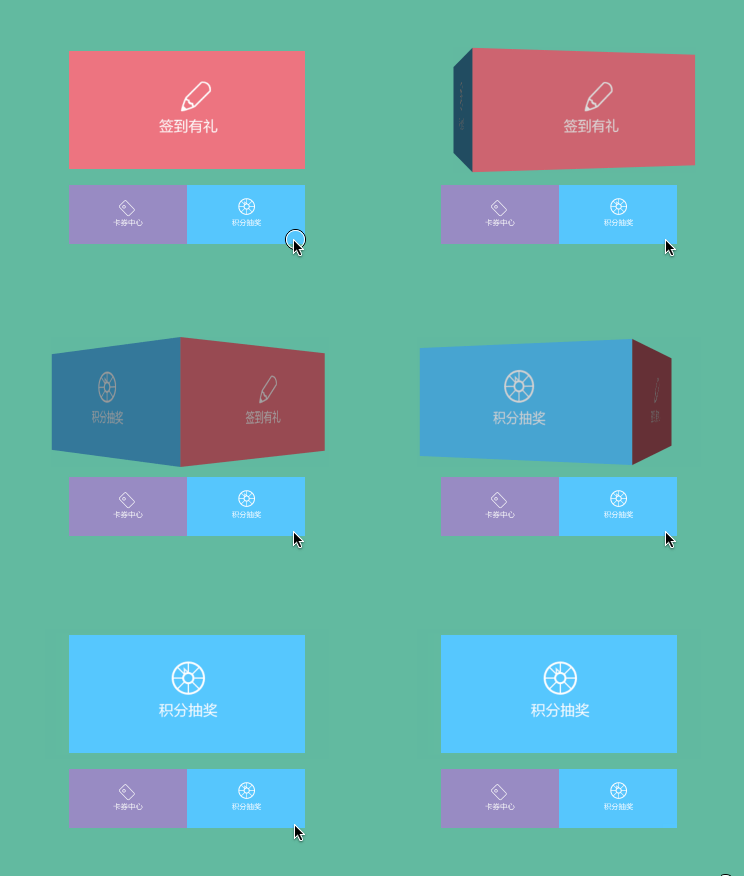
2. transitionWithView: 可以通过 transitionWithView 实现单个视图的过渡效果,表现如下:
可能这时候就有同学想问这种效果难道不能通过 animateWithDuration 来进行实现吗?不能,我已经帮你试过了:
1 2 3 4 5 6 7 8 9 UIImageView *imageView = [[UIImageView alloc] initWithFrame:CGRectMake(150, 150, 50, 50)]; imageView.image = [UIImage imageNamed:@"colorring.png"]; [self.view addSubview:imageView]; —————————————— [UIView animateWithDuration:2 animations:^{ imageView.image = [UIImage imageNamed:@"logo.png"]; }];
上面这段代码并不能实现在2秒内替换image,使用下面这段代码才能work:
1 2 3 4 5 [UIView transitionWithView:self.imageView duration:1.0 options:UIViewAnimationOptionTransitionCrossDissolve animations:^{ self.imageView.image = [UIImage imageNamed:@"logo.png"];; } completion:^(BOOL finished) { NSLog(@"动画结束"); }];
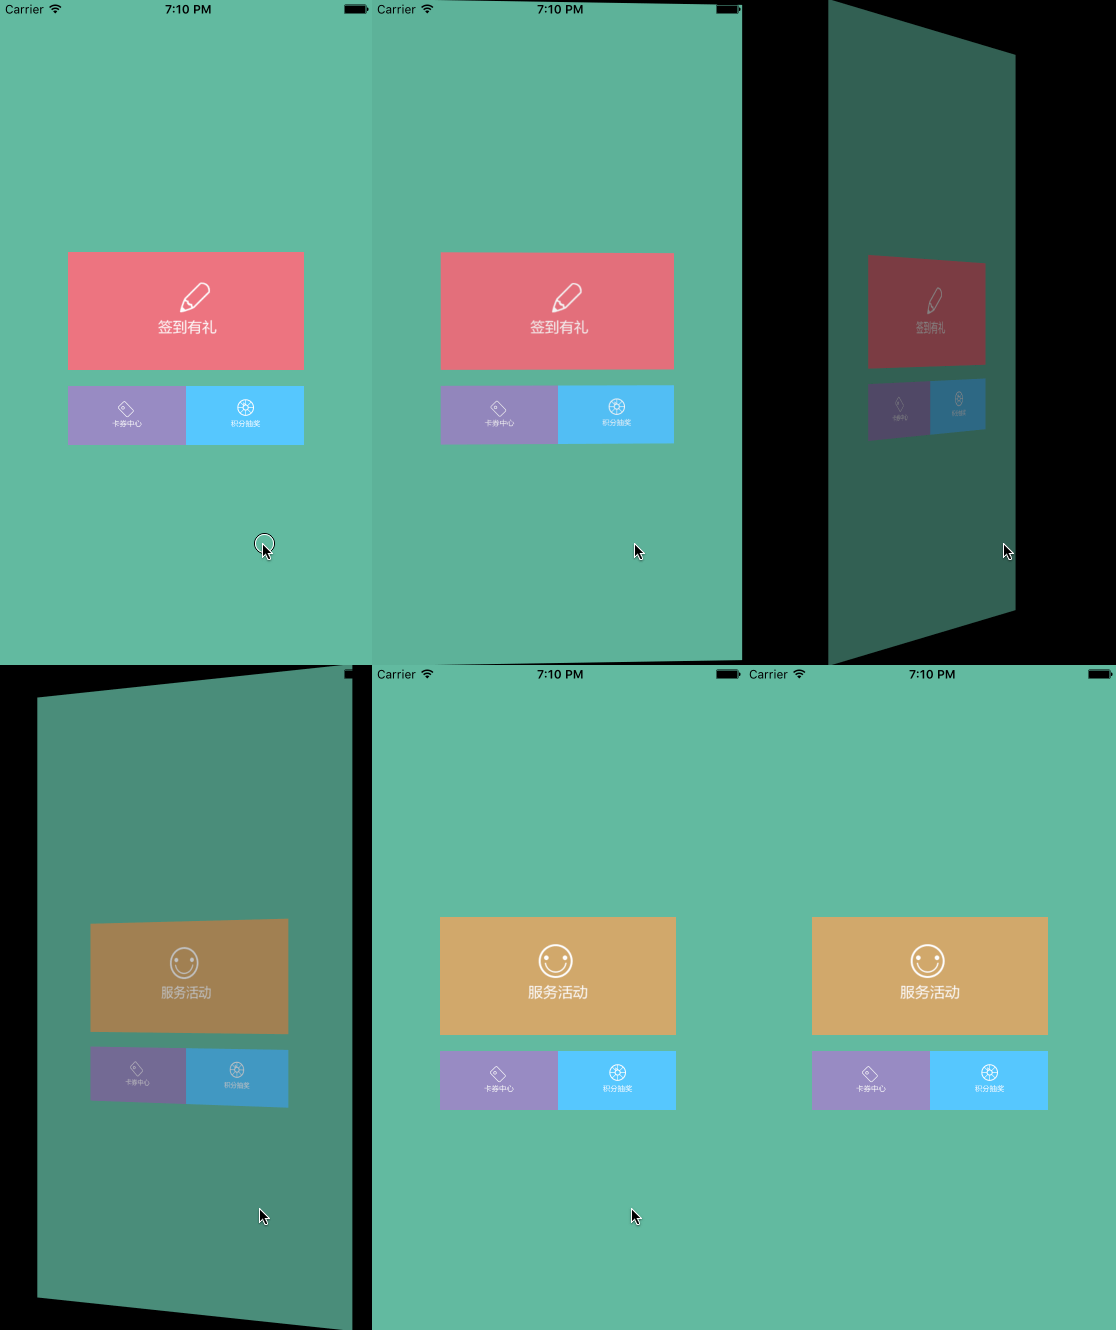
3. transitionFromView: 从旧视图转到新视图的动画效果:
1 2 3 4 5 6 7 - (void)blockAni7 { UIImageView * newCenterShow = [[UIImageView alloc]initWithFrame:self.centerShow.frame]; newCenterShow.image = [UIImage imageNamed:@"Service"]; [UIView transitionFromView:self.centerShow toView:newCenterShow duration:1.0 options:UIViewAnimationOptionTransitionFlipFromLeft completion:^(BOOL finished) { NSLog(@"动画结束"); }]; }
Tips:超冷门api,整个项目里都没有一处调用,谨慎使用。
Apple从iOS7开始加入了一个方法,允许我们执行系统动画,且可以并行地执行附加动画
1 2 3 4 5 6 7 8 9 10 11 12 13 14 15 16 17 18 19 20 21 22 /** * 在一个或多个视图上执行系统动画 * * @param animation 系统动画,暂时只有UISystemAnimationDelete一个 * @param views 执行动画的views数组 * @param options 动画选择项 * @param parallelAnimations 并行附加动画Block * @param completion 动画执行完执行的Block * * @return 无返回值 */ + (void)performSystemAnimation:(UISystemAnimation)animation onViews:(NSArray<__kindof UIView *> *)views options:(UIViewAnimationOptions)options animations:(void (^ __nullable)(void))parallelAnimations completion:(void (^ __nullable)(BOOL finished))completion; // 以"执行系统删除动画"为例,代码如下 [UIView performSystemAnimation:UISystemAnimationDelete onViews:@[self.demoImageView] options:UIViewAnimationOptionCurveEaseInOut animations:^{ // do something.... } completion:^(BOOL finished) { if (finished) { // do something.... } }];
注: 附加动画不要修改正在被系统动画修改的属性
5. modifyAnimationsWithRepeatCount Tips:超冷门api,整个项目里都没有一处调用,谨慎使用,且听说调用者很容易crash。
将指定动画重复特定次数,可选择向前和向后运行动画。
(三)UIViewKeyframeAnimations 1 2 3 4 5 @interface UIView (UIViewKeyframeAnimations) + (void)animateKeyframesWithDuration:(NSTimeInterval)duration delay:(NSTimeInterval)delay options:(UIViewKeyframeAnimationOptions)options animations:(void (^)(void))animations completion:(void (^ __nullable)(BOOL finished))completion API_AVAILABLE(ios(7.0)); + (void)addKeyframeWithRelativeStartTime:(double)frameStartTime relativeDuration:(double)frameDuration animations:(void (^)(void))animations API_AVAILABLE(ios(7.0)); @end
animateKeyframesWithDuration 是执行关键帧动画的方法, addKeyframeWithRelativeStartTime 负责添加关键帧。
iOS7.0后新增关键帧动画,支持属性关键帧,不支持路径关键帧
1 2 3 4 5 6 7 8 9 [UIView animateKeyframesWithDuration:(NSTimeInterval)//动画持续时间 delay:(NSTimeInterval)//动画延迟执行的时间 options:(UIViewKeyframeAnimationOptions)//动画的过渡效果 animations:^{ //执行的关键帧动画 } completion:^(BOOL finished) { //动画执行完毕后的操作 }];
UIViewKeyframeAnimationOptions的枚举值如下,可组合使用:
1 2 3 4 5 6 7 8 9 10 11 12 13 UIViewAnimationOptionLayoutSubviews //进行动画时布局子控件 UIViewAnimationOptionAllowUserInteraction //进行动画时允许用户交互 UIViewAnimationOptionBeginFromCurrentState //从当前状态开始动画 UIViewAnimationOptionRepeat //无限重复执行动画 UIViewAnimationOptionAutoreverse //执行动画回路 UIViewAnimationOptionOverrideInheritedDuration //忽略嵌套动画的执行时间设置 UIViewAnimationOptionOverrideInheritedOptions //不继承父动画设置 UIViewKeyframeAnimationOptionCalculationModeLinear //运算模式 :连续 UIViewKeyframeAnimationOptionCalculationModeDiscrete //运算模式 :离散 UIViewKeyframeAnimationOptionCalculationModePaced //运算模式 :均匀执行 UIViewKeyframeAnimationOptionCalculationModeCubic //运算模式 :平滑 UIViewKeyframeAnimationOptionCalculationModeCubicPaced //运算模式 :平滑均匀
增加关键帧的方法:
1 2 3 4 5 [UIView addKeyframeWithRelativeStartTime:(double)//动画开始的时间(占总时间的比例) relativeDuration:(double) //动画持续时间(占总时间的比例) animations:^{ //执行的动画 }];
示例:
1 2 3 4 5 6 7 8 9 10 11 12 13 14 15 16 17 18 19 20 21 22 23 24 25 26 27 28 29 30 31 32 33 34 35 [UIView animateKeyframesWithDuration:1.2 delay:0.0 options:UIViewKeyframeAnimationOptionCalculationModeLinear animations:^{ CGAffineTransform originTransform = likeImageView.transform; [UIView addKeyframeWithRelativeStartTime:0.0 relativeDuration:0.1 animations:^{ likeImageView.transform = CGAffineTransformScale(originTransform, 3.75, 3.75); likeImageView.alpha = 0.5; }]; [UIView addKeyframeWithRelativeStartTime:0.1 relativeDuration:0.1 animations:^{ likeImageView.transform = CGAffineTransformScale(originTransform, 3.25, 3.25); likeImageView.alpha = 0.7; }]; [UIView addKeyframeWithRelativeStartTime:0.2 relativeDuration:0.1 animations:^{ likeImageView.transform = CGAffineTransformScale(originTransform, 3.5, 3.5); likeImageView.alpha = 0.9; }]; [UIView addKeyframeWithRelativeStartTime:0.6 relativeDuration:0.6 animations:^{ likeImageView.alpha = 0.1; }]; } completion:^(BOOL finished) { [likeImageView removeFromSuperview]; }];
二、CoreAnimation 实现动画效果 CoreAnimation 也就是 核心动画,系统提供的最关键的类在:CoreAnimation.h
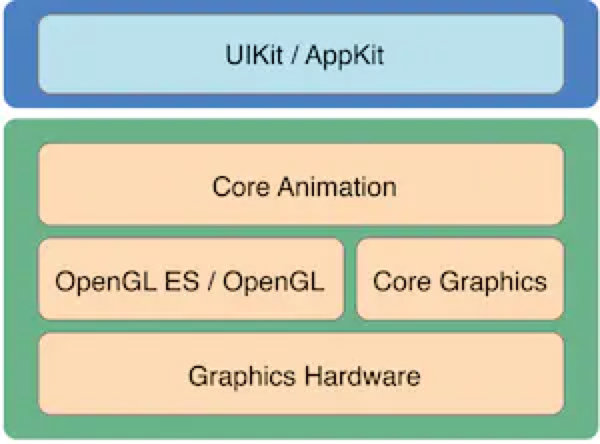
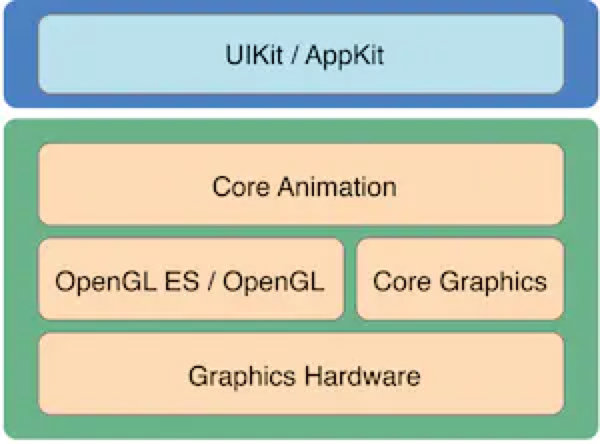
本质上说 UIView 对于动画的实现都是基于 CoreAnimation 的封装:
CoreAnimation 可以直接作用于 CALayer(每一个view都有其对应的layer,这个layer是root layer)。
核心动画和UIView动画的对比:UIView动画可以看成是对核心动画的封装。
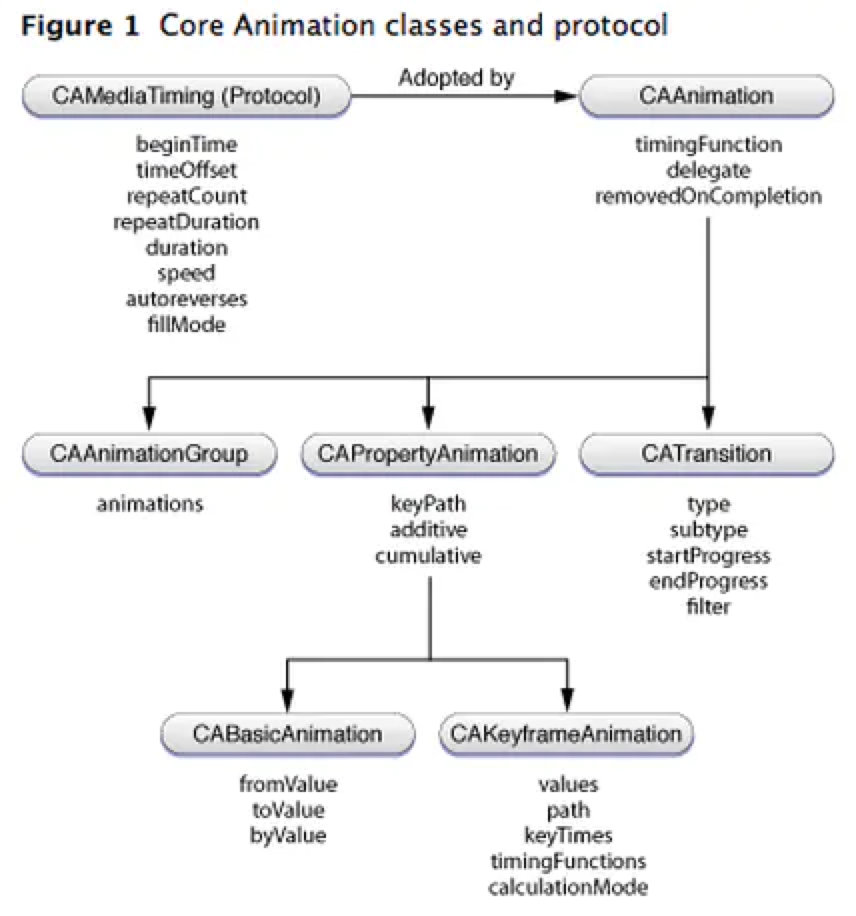
和UIView动画不同的是,通过核心动画改变layer的状态(比如position),动画执行完毕后实际上是没有改变的(表面上看起来已改变),CoreAnimation 的结构图如下:
我们首先按顺序解析一下 CoreAnimation.h 提供的API接口:
1 2 3 4 5 6 7 8 9 10 11 12 13 14 15 16 17 18 19 20 21 22 23 24 25 26 27 28 29 30 31 32 33 34 35 36 37 38 39 40 41 42 43 44 45 46 47 48 49 50 51 52 53 54 55 56 57 58 59 60 61 62 63 64 65 66 67 68 69 70 71 72 73 74 75 76 77 78 79 80 81 82 83 84 85 86 87 88 89 90 91 92 93 94 95 96 97 98 99 100 101 102 103 104 105 106 107 108 109 110 111 112 113 114 115 116 117 118 119 120 121 122 123 124 125 126 127 128 129 130 131 132 133 134 135 136 137 138 139 140 141 142 143 144 /* CoreAnimation - CAAnimation.h Copyright (c) 2006-2018, Apple Inc. All rights reserved. */ #import <QuartzCore/CALayer.h> #import <Foundation/NSObject.h> @class NSArray, NSString, CAMediaTimingFunction, CAValueFunction; @protocol CAAnimationDelegate; NS_ASSUME_NONNULL_BEGIN typedef NSString * CAAnimationCalculationMode NS_TYPED_ENUM; typedef NSString * CAAnimationRotationMode NS_TYPED_ENUM; typedef NSString * CATransitionType NS_TYPED_ENUM; typedef NSString * CATransitionSubtype NS_TYPED_ENUM; API_AVAILABLE(macos(10.5), ios(2.0), watchos(2.0), tvos(9.0)) @interface CAAnimation : NSObject <NSSecureCoding, NSCopying, CAMediaTiming, CAAction> { @private void *_attr; uint32_t _flags; } + (instancetype)animation; + (nullable id)defaultValueForKey:(NSString *)key; - (BOOL)shouldArchiveValueForKey:(NSString *)key; @property(nullable, strong) CAMediaTimingFunction *timingFunction; @property(nullable, strong) id <CAAnimationDelegate> delegate; @property(getter=isRemovedOnCompletion) BOOL removedOnCompletion; @end @protocol CAAnimationDelegate <NSObject> @optional - (void)animationDidStart:(CAAnimation *)anim; - (void)animationDidStop:(CAAnimation *)anim finished:(BOOL)flag; @end API_AVAILABLE(macos(10.5), ios(2.0), watchos(2.0), tvos(9.0)) @interface CAPropertyAnimation : CAAnimation + (instancetype)animationWithKeyPath:(nullable NSString *)path; @property(nullable, copy) NSString *keyPath; @property(getter=isAdditive) BOOL additive; @property(getter=isCumulative) BOOL cumulative; @property(nullable, strong) CAValueFunction *valueFunction; @end API_AVAILABLE(macos(10.5), ios(2.0), watchos(2.0), tvos(9.0)) @interface CABasicAnimation : CAPropertyAnimation @property(nullable, strong) id fromValue; @property(nullable, strong) id toValue; @property(nullable, strong) id byValue; @end API_AVAILABLE(macos(10.5), ios(2.0), watchos(2.0), tvos(9.0)) @interface CAKeyframeAnimation : CAPropertyAnimation @property(nullable, copy) NSArray *values; @property(nullable) CGPathRef path; @property(nullable, copy) NSArray<NSNumber *> *keyTimes; @property(nullable, copy) NSArray<CAMediaTimingFunction *> *timingFunctions; @property(copy) CAAnimationCalculationMode calculationMode; @property(nullable, copy) NSArray<NSNumber *> *tensionValues; @property(nullable, copy) NSArray<NSNumber *> *continuityValues; @property(nullable, copy) NSArray<NSNumber *> *biasValues; @property(nullable, copy) CAAnimationRotationMode rotationMode; @end CA_EXTERN CAAnimationRotationMode const kCAAnimationRotateAuto API_AVAILABLE(macos(10.5), ios(2.0), watchos(2.0), tvos(9.0)); CA_EXTERN CAAnimationRotationMode const kCAAnimationRotateAutoReverse API_AVAILABLE(macos(10.5), ios(2.0), watchos(2.0), tvos(9.0)); API_AVAILABLE(macos(10.11), ios(9.0), watchos(2.0), tvos(9.0)) @interface CASpringAnimation : CABasicAnimation @property CGFloat mass; @property CGFloat stiffness; @property CGFloat damping; @property CGFloat initialVelocity; @property(readonly) CFTimeInterval settlingDuration; @end API_AVAILABLE(macos(10.5), ios(2.0), watchos(2.0), tvos(9.0)) @interface CATransition : CAAnimation @property(copy) CATransitionType type; @property(nullable, copy) CATransitionSubtype subtype; @property float startProgress; @property float endProgress; @end CA_EXTERN CATransitionSubtype const kCATransitionFromRight API_AVAILABLE(macos(10.5), ios(2.0), watchos(2.0), tvos(9.0)); CA_EXTERN CATransitionSubtype const kCATransitionFromLeft API_AVAILABLE(macos(10.5), ios(2.0), watchos(2.0), tvos(9.0)); CA_EXTERN CATransitionSubtype const kCATransitionFromTop API_AVAILABLE(macos(10.5), ios(2.0), watchos(2.0), tvos(9.0)); CA_EXTERN CATransitionSubtype const kCATransitionFromBottom API_AVAILABLE(macos(10.5), ios(2.0), watchos(2.0), tvos(9.0)); API_AVAILABLE(macos(10.5), ios(2.0), watchos(2.0), tvos(9.0)) @interface CAAnimationGroup : CAAnimation @property(nullable, copy) NSArray<CAAnimation *> *animations; @end NS_ASSUME_NONNULL_END
CALayer 图层类
CAAnimation 动画计时类
CAAnimationGroup 是个动画组,可以同时进行缩放,旋转
CAPropertyAnimation 也是个抽象类,本身不具备动画效果,只有子类才有。
CATransition 转场动画,界面之间跳转(切换)
CAConstraint 布局约束类
CATransaction 事物类,可以同时设置多个layer层的动画效果。可以通过隐式和显式两种方式来进行动画操作
1. CAAnimation (1)+ (id)animation 静态方法,通过调用 [CAAnimation animation] 可以生成 CAAnimation 对象。
(2)+ (id)defaultValueForKey:(NSString *)key 根据属性key,返回相应的属性值。
(3)- (BOOL)shouldArchiveValueForKey:(NSString *)key 返回指定的属性值是否可以归档。
key:指定的属性。
YES:指明该属性可以被归档;NO:不能被归档。
(4) timingFunction timingFunction:动画的时间节奏控制
1 2 3 4 5 kCAMediaTimingFunctionLinear 匀速 kCAMediaTimingFunctionEaseIn 慢进 kCAMediaTimingFunctionEaseOut 慢出 kCAMediaTimingFunctionEaseInEaseOut 慢进慢出 kCAMediaTimingFunctionDefault 默认值(慢进慢出)
(5)id delegate 这个代理有两个回调,动画开始 和 动画结束:
1 2 - (void)animationDidStart:(CAAnimation *)anim; //动画开始 - (void)animationDidStop:(CAAnimation *)anim finished:(BOOL)flag; //动画结束
2. CAPropertyAnimation : CAAnimation 是CAAnimation的子类,它支持动画地显示图层的keyPath,一般不直接使用。
3. CABasicAnimation : CAPropertyAnimation : CAAnimation CABasicAnimation 只有3个但非常重要的属性:
1 2 3 @property(nullable, strong) id fromValue; @property(nullable, strong) id toValue; @property(nullable, strong) id byValue;
CABasicAnimation可以设定keyPath的起点,终点的值,动画会沿着设定点进行移动,CABasicAnimation可以看成是只有两个关键点的特殊的CAKeyFrameAnimation。
下面以改变视图的position为例演示其使用:
1 2 3 4 5 6 7 8 - (void)position { CABasicAnimation * ani = [CABasicAnimation animationWithKeyPath:@"position"]; ani.toValue = [NSValue valueWithCGPoint:self.centerShow.center]; ani.removedOnCompletion = NO; ani.fillMode = kCAFillModeForwards; ani.timingFunction = [CAMediaTimingFunction functionWithName:kCAMediaTimingFunctionEaseInEaseOut]; [self.cartCenter.layer addAnimation:ani forKey:@"PostionAni"]; }
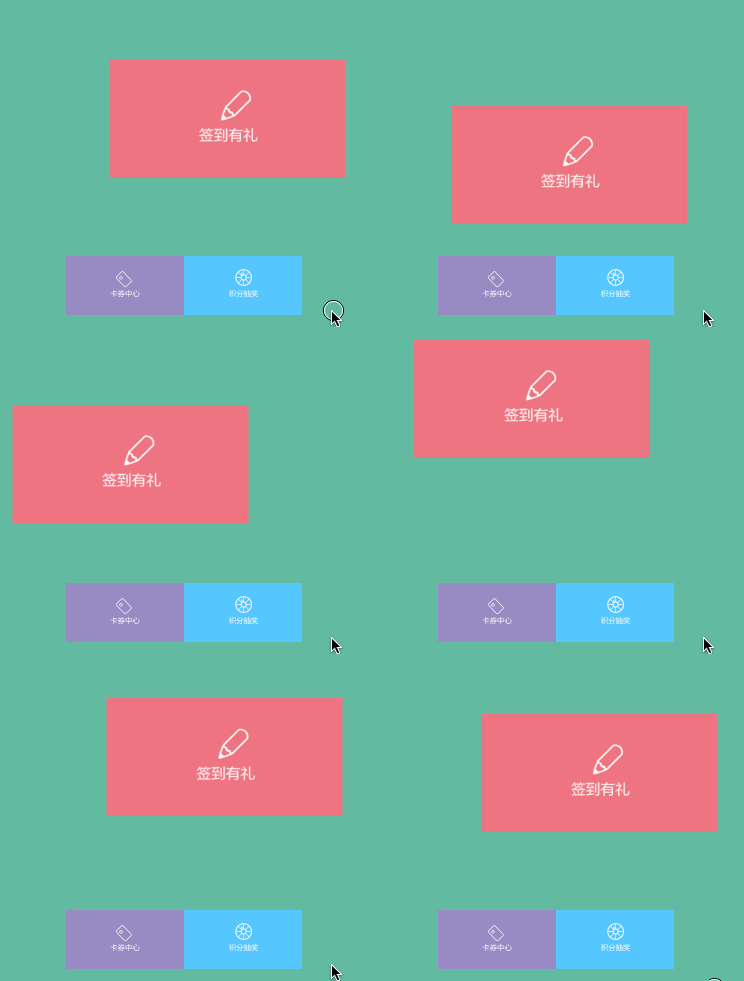
动画效果:
4. CAKeyframeAnimation : CAPropertyAnimation 制作关键帧动画的对象。
(1)values\path\keyTimes 这三个属性介绍的顺序应该是,针对 path 这个动画类型,添加 values 动画动作,使用 keyTimes 对每个动画添加时间控制。
设置values使其沿正方形运动
1 2 3 4 5 6 7 8 9 10 11 12 13 14 15 - (void)valueKeyframeAni { CAKeyframeAnimation * ani = [CAKeyframeAnimation animationWithKeyPath:@"position"]; ani.duration = 4.0; ani.removedOnCompletion = NO; ani.fillMode = kCAFillModeForwards; ani.timingFunction = [CAMediaTimingFunction functionWithName:kCAMediaTimingFunctionEaseInEaseOut]; NSValue * value1 = [NSValue valueWithCGPoint:CGPointMake(150, 200)]; NSValue *value2=[NSValue valueWithCGPoint:CGPointMake(250, 200)]; NSValue *value3=[NSValue valueWithCGPoint:CGPointMake(250, 300)]; NSValue *value4=[NSValue valueWithCGPoint:CGPointMake(150, 300)]; NSValue *value5=[NSValue valueWithCGPoint:CGPointMake(150, 200)]; ani.values = @[value1, value2, value3, value4, value5]; ani.keyTimes = @[@0.2, @0.2, @0.2, @0.2, @0.2]; [self.centerShow.layer addAnimation:ani forKey:@"PostionKeyframeValueAni"]; }
表现:
设置path使其绕圆圈运动
1 2 3 4 5 6 7 8 9 10 11 - (void)pathKeyframeAni { CAKeyframeAnimation * ani = [CAKeyframeAnimation animationWithKeyPath:@"position"]; CGMutablePathRef path = CGPathCreateMutable(); CGPathAddEllipseInRect(path, NULL, CGRectMake(130, 200, 100, 100)); ani.path = path; CGPathRelease(path); ani.duration = 4.0; ani.removedOnCompletion = NO; ani.fillMode = kCAFillModeForwards; [self.centerShow.layer addAnimation:ani forKey:@"PostionKeyframePathAni"]; }
表现:
5. CASpringAnimation : CABasicAnimation CASpringAnimation 主要是用来实现弹簧动画,关键的几个属性都是和设置弹簧动画有关,罗列如下:
mass:质量(影响弹簧的惯性,质量越大,弹簧惯性越大,运动的幅度越大)
stiffness:弹性系数(弹性系数越大,弹簧的运动越快)
damping:阻尼系数(阻尼系数越大,弹簧的停止越快)
initialVelocity:初始速率(弹簧动画的初始速度大小,弹簧运动的初始方向与初始速率的正负一致,若初始速率为0,表示忽略该属性)
settlingDuration:结算时间(根据动画参数估算弹簧开始运动到停止的时间,动画设置的时间最好根据此时间来设置)
以实现视图的bounds变化的弹簧动画效果为例:
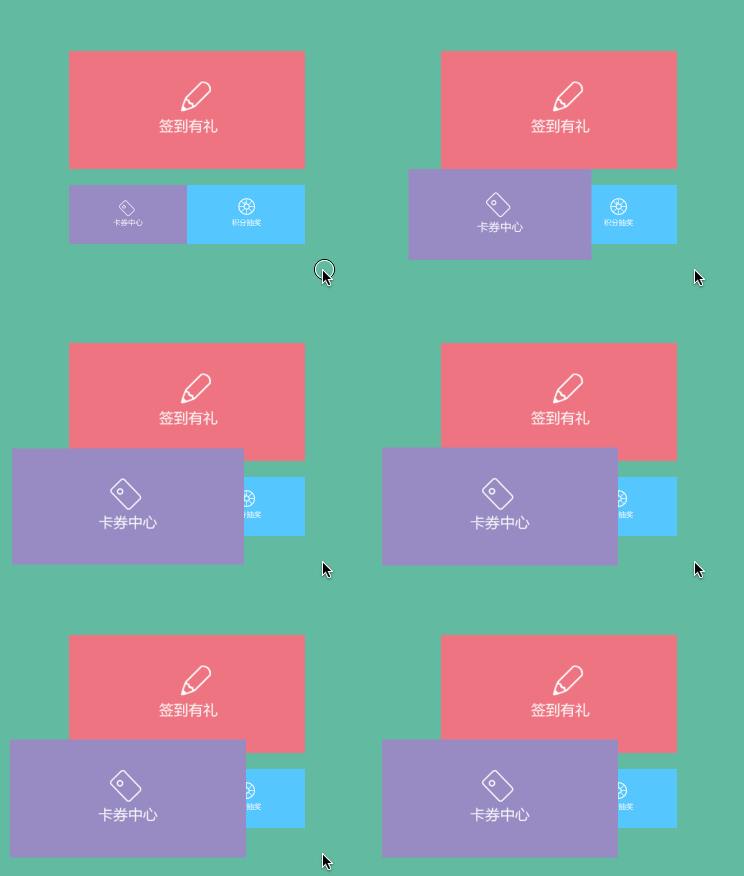
1 2 3 4 5 6 7 8 9 10 11 12 13 - (void)springAni { CASpringAnimation * ani = [CASpringAnimation animationWithKeyPath:@"bounds"]; ani.mass = 10.0; //质量,影响图层运动时的弹簧惯性,质量越大,弹簧拉伸和压缩的幅度越大 ani.stiffness = 5000; //刚度系数(劲度系数/弹性系数),刚度系数越大,形变产生的力就越大,运动越快 ani.damping = 100.0;//阻尼系数,阻止弹簧伸缩的系数,阻尼系数越大,停止越快 ani.initialVelocity = 5.f;//初始速率,动画视图的初始速度大小;速率为正数时,速度方向与运动方向一致,速率为负数时,速度方向与运动方向相反 ani.duration = ani.settlingDuration; ani.toValue = [NSValue valueWithCGRect:self.centerShow.bounds]; ani.removedOnCompletion = NO; ani.fillMode = kCAFillModeForwards; ani.timingFunction = [CAMediaTimingFunction functionWithName:kCAMediaTimingFunctionEaseInEaseOut]; [self.cartCenter.layer addAnimation:ani forKey:@"boundsAni"]; }
表现:
6. CATransition : CAAnimation CATransition 主要用于转场动画,关键的属性如下:
type:过渡动画的类型
subtype: 过渡动画的方向
(1)type 1 2 3 4 kCATransitionFade 渐变 kCATransitionMoveIn 覆盖 kCATransitionPush 推出 kCATransitionReveal 揭开
(1)subtype 1 2 3 4 kCATransitionFromRight 从右边 kCATransitionFromLeft 从左边 kCATransitionFromTop 从顶部 kCATransitionFromBottom 从底部
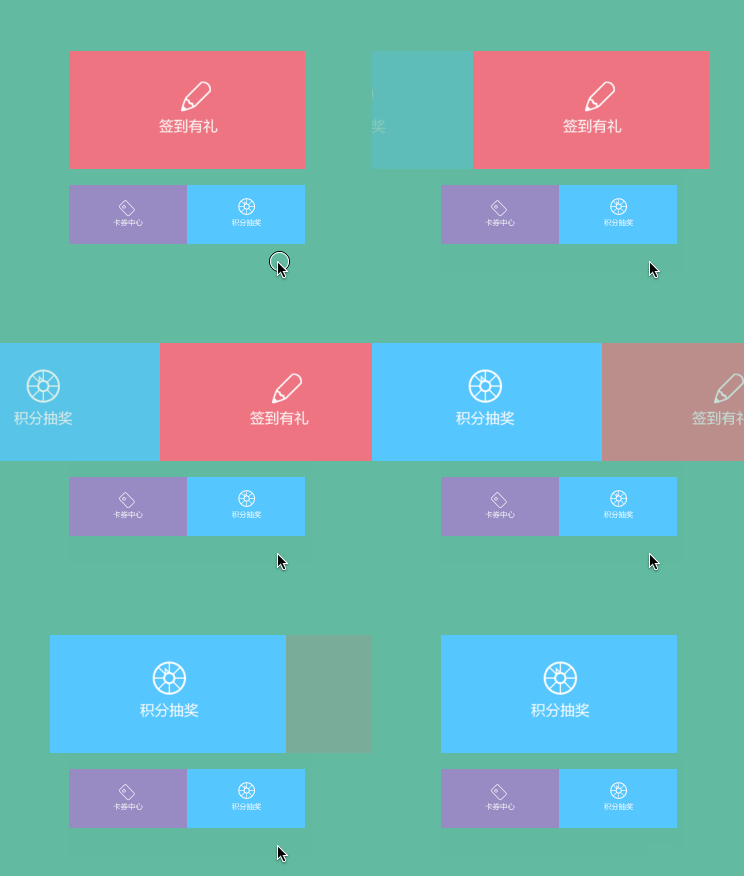
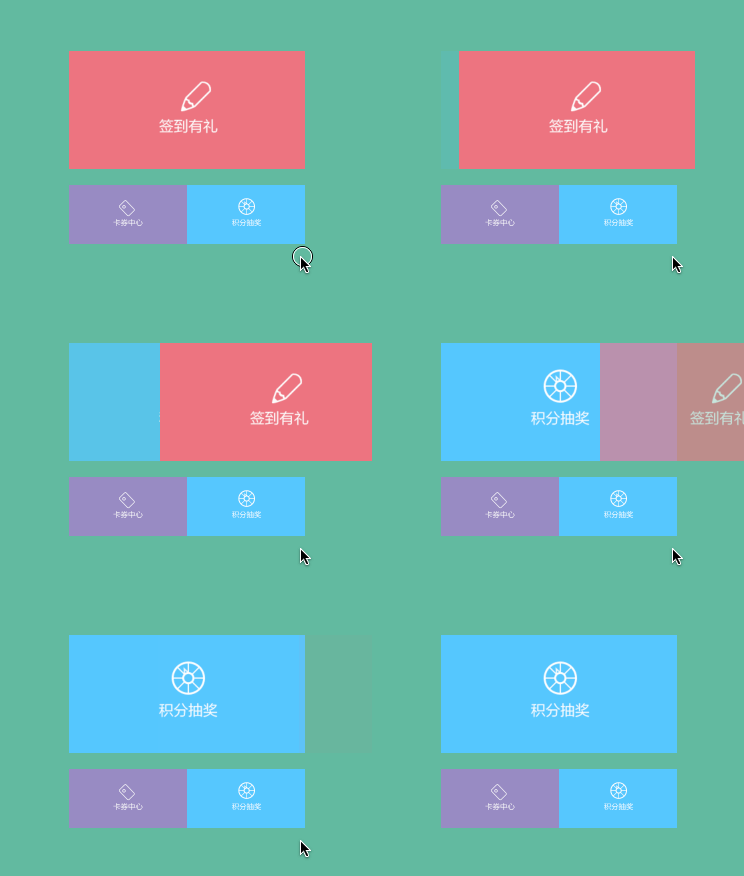
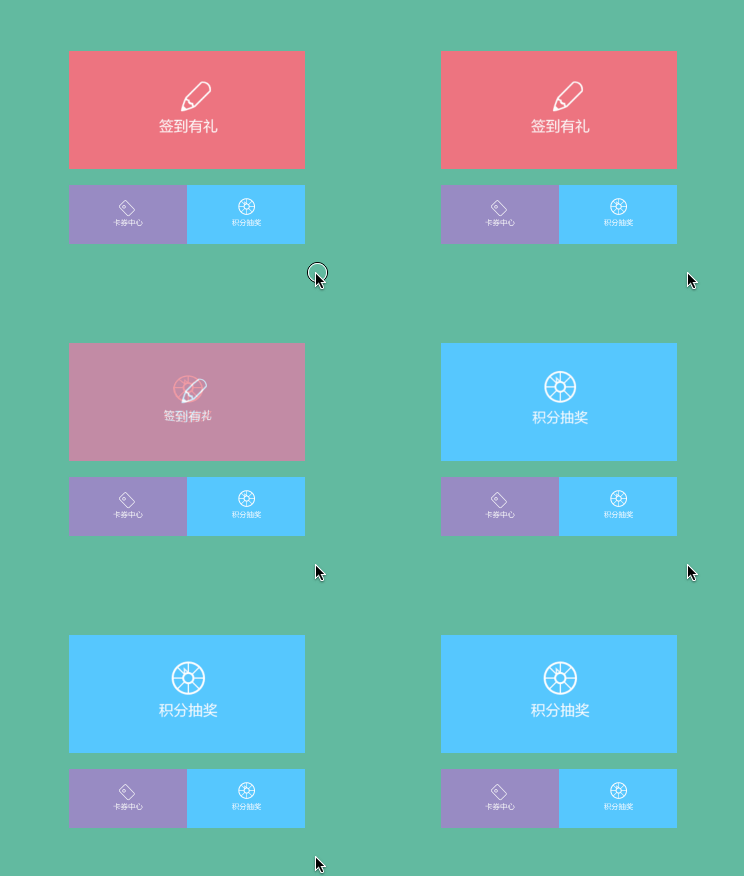
CATransition 能实现的动画非常精美,我把我借鉴一位博主的gif图也收集到这里(想深入了解可至文末点击相关链接):
以渐变效果为例
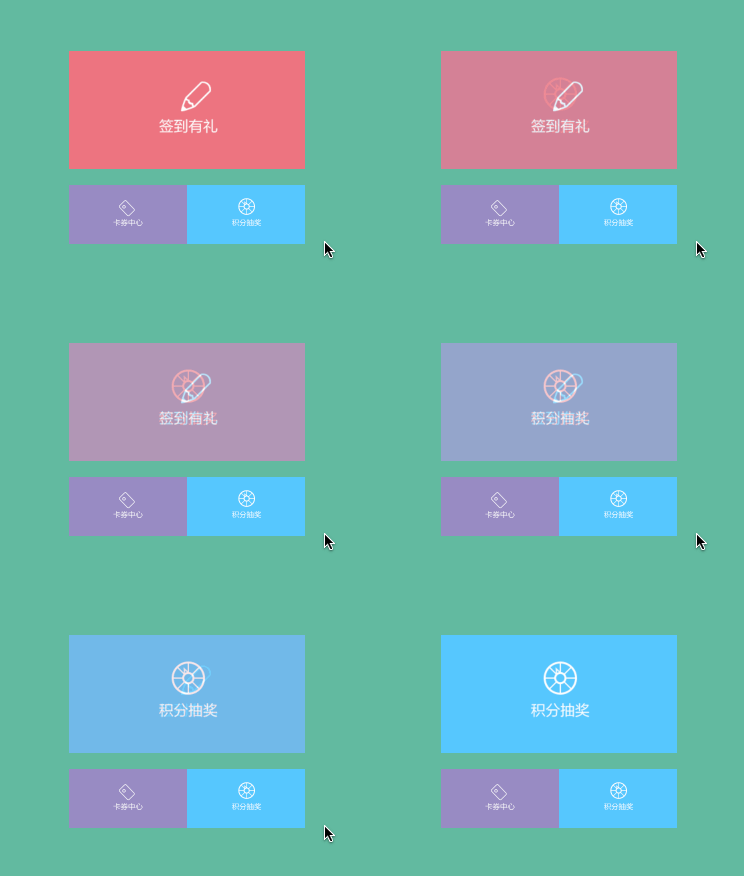
1 2 3 4 5 6 7 8 - (void)transitionAni { CATransition * ani = [CATransition animation]; ani.type = kCATransitionFade; ani.subtype = kCATransitionFromLeft; ani.duration = 1.5; self.centerShow.image = [UIImage imageNamed:@"Raffle"]; [self.centerShow.layer addAnimation:ani forKey:@"transitionAni"]; }
动画效果:
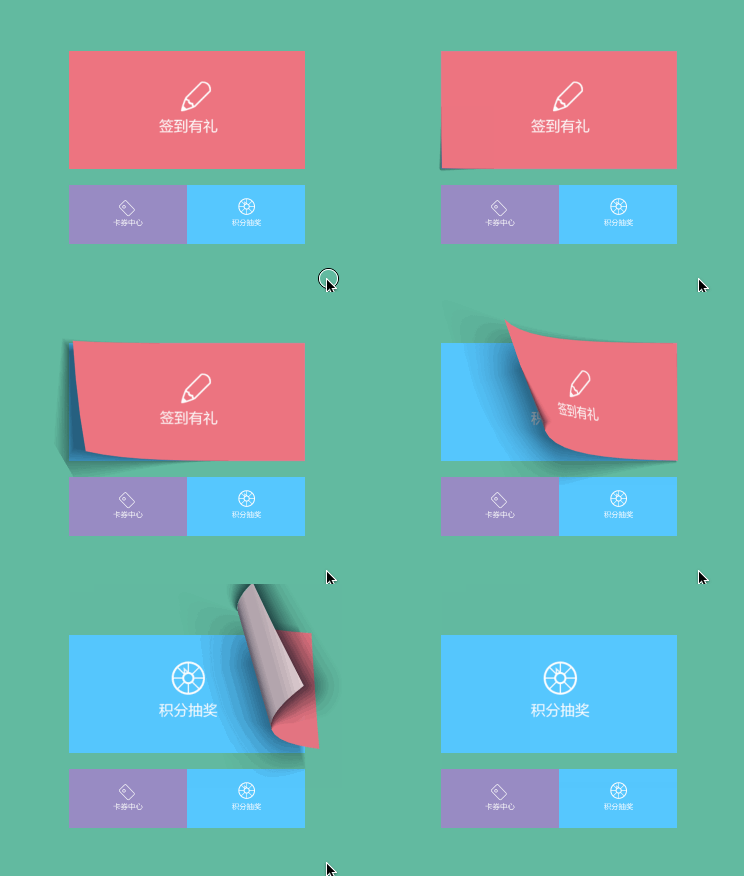
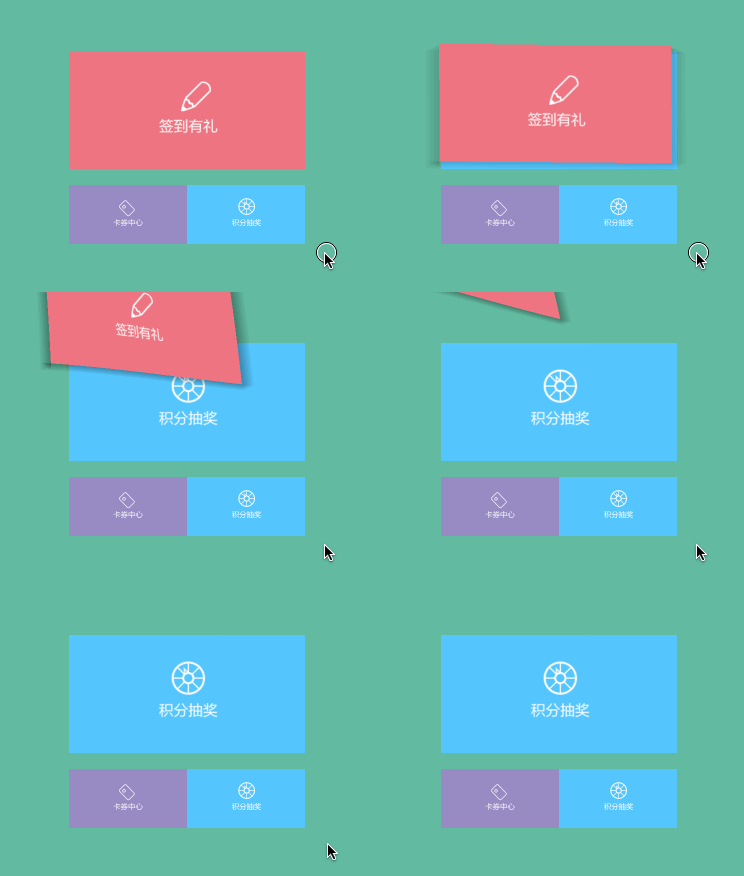
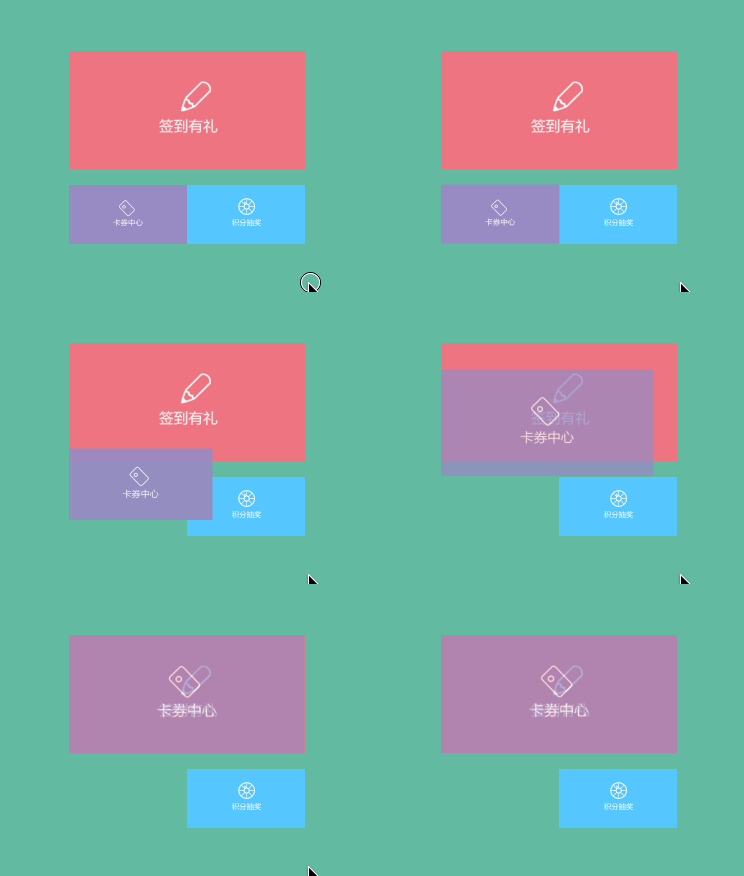
以下是另外三种转场类型的动画效果(图片名称对应其type类型):
还有一些私有动画类型,效果很炫酷,我们就开开眼,不过不推荐使用(可能会无法过审)。
私有动画类型的值有:”cube”、”suckEffect”、”oglFlip”、 “rippleEffect”、”pageCurl”、”pageUnCurl”等等。
7. CAAnimationGroup : CAAnimation 使用Group可以将多个动画合并一起加入到层中,Group中所有动画并发执行,可以方便地实现需要多种类型动画的场景。我曾经使用 Group 完成过一个跨 window 的复杂动画,效果挺惊艳的。
以实现视图的position、bounds和opacity改变的组合动画为例
1 2 3 4 5 6 7 8 9 10 11 12 13 14 15 16 17 18 19 - (void)groupAni { CABasicAnimation * posAni = [CABasicAnimation animationWithKeyPath:@"position"]; posAni.toValue = [NSValue valueWithCGPoint:self.centerShow.center]; CABasicAnimation * opcAni = [CABasicAnimation animationWithKeyPath:@"opacity"]; opcAni.toValue = [NSNumber numberWithFloat:1.0]; opcAni.toValue = [NSNumber numberWithFloat:0.7]; CABasicAnimation * bodAni = [CABasicAnimation animationWithKeyPath:@"bounds"]; bodAni.toValue = [NSValue valueWithCGRect:self.centerShow.bounds]; CAAnimationGroup * groupAni = [CAAnimationGroup animation]; groupAni.animations = @[posAni, opcAni, bodAni]; groupAni.duration = 1.0; groupAni.fillMode = kCAFillModeForwards; groupAni.removedOnCompletion = NO; groupAni.timingFunction = [CAMediaTimingFunction functionWithName:kCAMediaTimingFunctionEaseInEaseOut]; [self.cartCenter.layer addAnimation:groupAni forKey:@"groupAni"]; }
三、UIViewPropertyAnimator 交互动画 之所以把 UIViewPropertyAnimator 单独拎出来说,是因为UIViewPropertyAnimator既不在UIView动画API之列,也不在CoreAnimationAPI,再加上我今天也针对UIViewPropertyAnimator进行了试用了解,所以就单独做一小节。
了解 UIViewPropertyAnimator 的背景是我突然想起来 UIViewPropertyAnimator 可以给动画设置 progress,我之前写过一篇关于progressBar的文章,其中为了解决progressBar的动画问题使用到了CAMediaTiming相关的属性,最终迭代了好几个流程,才把一个进度条交付上线,感兴趣的话可以看这篇文章:打造高可用iOS进度条
。
其中比较麻烦的一个问题就是:在高频(也不是非常高频,有0.3s的间隔)改变进度的背景下,如果让进度条动画变得很平稳。
我们先看 UIViewPropertyAnimator.h 里的内容:
1 2 3 4 5 6 7 8 9 10 11 12 13 14 15 16 17 18 19 20 21 22 23 24 25 26 27 28 29 30 31 32 33 34 35 36 37 38 39 40 41 42 43 44 45 46 47 48 49 50 51 52 53 54 #import <Foundation/Foundation.h> #import <UIKit/UIViewAnimating.h> #import <UIKit/UIKitDefines.h> #import <UIKit/UITimingParameters.h> NS_ASSUME_NONNULL_BEGIN UIKIT_EXTERN API_AVAILABLE(ios(10.0)) @interface UIViewPropertyAnimator : NSObject <UIViewImplicitlyAnimating, NSCopying> @property(nullable, nonatomic, copy, readonly) id <UITimingCurveProvider> timingParameters; @property(nonatomic, readonly) NSTimeInterval duration; @property(nonatomic, readonly) NSTimeInterval delay; @property(nonatomic, getter=isUserInteractionEnabled) BOOL userInteractionEnabled; @property(nonatomic, getter=isManualHitTestingEnabled) BOOL manualHitTestingEnabled; @property(nonatomic, getter=isInterruptible) BOOL interruptible; @property(nonatomic) BOOL scrubsLinearly API_AVAILABLE(ios(11.0)); @property(nonatomic) BOOL pausesOnCompletion API_AVAILABLE(ios(11.0)); - (instancetype)initWithDuration:(NSTimeInterval)duration timingParameters:(id <UITimingCurveProvider>)parameters NS_DESIGNATED_INITIALIZER; - (instancetype)initWithDuration:(NSTimeInterval)duration curve:(UIViewAnimationCurve)curve animations:(void (^ __nullable)(void))animations; - (instancetype)initWithDuration:(NSTimeInterval)duration controlPoint1:(CGPoint)point1 controlPoint2:(CGPoint)point2 animations:(void (^ __nullable)(void))animations; - (instancetype)initWithDuration:(NSTimeInterval)duration dampingRatio:(CGFloat)ratio animations:(void (^ __nullable)(void))animations; + (instancetype)runningPropertyAnimatorWithDuration:(NSTimeInterval)duration delay:(NSTimeInterval)delay options:(UIViewAnimationOptions)options animations:(void (^)(void))animations completion:(void (^ __nullable)(UIViewAnimatingPosition finalPosition))completion; - (void)addAnimations:(void (^)(void))animation delayFactor:(CGFloat)delayFactor; - (void)addAnimations:(void (^)(void))animation; - (void)addCompletion:(void (^)(UIViewAnimatingPosition finalPosition))completion; - (void)continueAnimationWithTimingParameters:(nullable id <UITimingCurveProvider>)parameters durationFactor:(CGFloat)durationFactor; @end NS_ASSUME_NONNULL_END #else #import <UIKitCore/UIViewPropertyAnimator.h> #endif
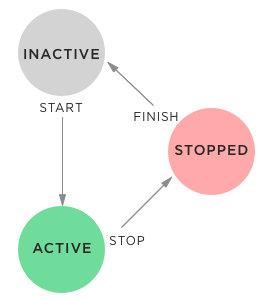
UIViewPropertyAnimator 将动画分成了3个状态:
active:动画开始或暂停(注意!暂停也是active)
inactive:当控件被创建出来且没有开始执行动画或者已经执行完动画的时候,它的状态是 inactive
stopped:当动画执行完毕或者使用 stop 命令暂停动画后,控件的状态变为 stopped,而在 animator 内部会调用 finishAnimation(at:) 来表明当前动画完毕, 然后会设置当前状态为 inactive,最后会调用 completion block 。(也就是说:在动画执行完毕时,stop 比 inactive 多了 finishAnimation 调用)
UIViewPropertyAnimator 最强大之处是解决了 手势 场景下,关联动画的问题,需要操作的属性是 setFractionComplete:,比如最常见的场景是:用户拖动进度条A,可以让一个圆形进度视图B有变更的动画。
而 setFractionComplete 不适用于 通过播放器播放进度回调来驱动进度 的原因是,setFractionComplete 的每次赋值都是直接将视图移动到目标进度,而不是有一个动画进行过渡,当播放器的回调时间间隔相当于 UIViewPropertyAnimator.duration 也比较大时,直接使用 setFractionComplete 会产生非常明显的 顿感 (即:一跳一跳的动画,而不是进度条平稳顺滑的动画)。
因为手势回调频率足够高,所以通过高频回调可以回避顿感,也即: UIViewPropertyAnimator 可以和 手势 一起实现视图的联动动画。
四、使用 Core Graphics 实现自定义View Core Graphic是一套基于C的框架,用于一切绘图操作,UIKit就是基于Core Graphic实现的,因此它可以实现比UIKit更底层的功能。
Core Graphic使用Quartz2D作为绘图引擎,因此Quartz2D其实是Core Graphic的一部分,这两个名词密不可分。
(一)制作流程 在view上绘制一个图形的方式有很多种,表现形式可能不一样,但其实质步骤都是一样的:
1)获取上下文
2)绘制路径
3)添加路径到上下文
4)修改图形状态参数
5)渲染上下文
1. 图形上下文 画画需要画布,Core Graphics工作是的“画布”就是图形上下文,它决定图形绘制成什么样子,并绘制到哪里去。在“画布”中,每个连续的绘制操作都可以看成添加一个“图层”到画布上,在运行中我们可以通过额外的绘制操作来叠加更多“图层”来形成复杂的图形。
推荐使用UIView自动为我们准备好的图形上下文,因为自定义上下文会降低内存的使用效率,导致性能下降。当需要我们调用UIGraphicsGetCurrentContext()来获取图形上下文。
2. 路径 相信很多人都临摹过书法,在一张薄薄的纸上照着书法家的笔迹来书写,这个“笔迹”就可以看成路径,通过确定的路径,可以确定绘图的形状、渲染的区域等等。
通过创建路径并加入到上下文中渲染就能绘制出想要的图形。
创建路径有以下三种方式:
(1)使用CGContextRef创建,如CGContextAddArc 这种方式是直接对图形上下文进行操作,常用的方法有:
1 2 3 4 5 6 7 8 CGContextBeginPath //开始画路径 CGContextMoveToPoint //移动到某一点 CGContexAddLineToPoint //画直线 CGContexAddCurveToPoint //画饼图 CGContexAddEllipseInRect //画椭圆 CGContexAddArc //画圆 CGContexAddRect //画方框 CGContexClosePath //封闭当前路径
(2)使用CGPathRef创建,如CGPathAddArc 使用方法一绘制路径后将清空图形上下文,如果我们想保存路径来复用,可以使用Quartz提供的CGPath函数集合来创建可复用的路径对象。
常用的函数如下:
1 2 3 4 5 6 7 8 CGPathCreateMutable CGPathMoveToPoint CGPathAddLineToPoint CGPathAddCurveToPoint CGPathAddEllipseInRect CGPathAddArc CGPathAddRect CGPathCloseSubpath
这些函数和上面方法一的一一对应,可代替之使用。
1 CGContextAddPath:添加一个新的路径
(3)使用UIBezierPath创建,如bezierPathWithOvalInRect (推荐使用) UIBezierPath存在于UIKit中,是对路径绘制的封装,和CGContextRef类似,优点是更面向对象,我们可以像操作普通对象一样对其进行操作。
在自定义View的时候,一般使用UIBezierPath来创建路径就能基本满足我们的需求,推荐使用。
UIBezierPath的常用方法如下:
1 2 3 @property(nonatomic) CGFloat lineWidth; //线的宽度 @property(nonatomic) CGLineCap lineCapStyle; //起点和终点样式 @property(nonatomic) CGLineJoin lineJoinStyle; //转角样式
1 2 3 4 5 6 7 8 9 10 11 12 13 14 15 16 17 18 19 20 21 22 23 24 25 26 27 28 29 30 31 32 //创建path + (instancetype)bezierPath; //矩形 + (instancetype)bezierPathWithRect:(CGRect)rect; //以矩形框为切线画圆 + (instancetype)bezierPathWithOvalInRect:(CGRect)rect; //带圆角的矩形框 + (instancetype)bezierPathWithRoundedRect:(CGRect)rect cornerRadius:(CGFloat)cornerRadius; // rounds all corners with the same horizontal and vertical radius //画圆弧 + (instancetype)bezierPathWithArcCenter:(CGPoint)center radius:(CGFloat)radius startAngle:(CGFloat)startAngle endAngle:(CGFloat)endAngle clockwise:(BOOL)clockwise; //移动到某一点 - (void)moveToPoint:(CGPoint)point; //添加直线 - (void)addLineToPoint:(CGPoint)point; //带一个基准点的曲线 - (void)addQuadCurveToPoint:(CGPoint)endPoint controlPoint:(CGPoint)controlPoint; //带两个基准点的曲线 - (void)addCurveToPoint:(CGPoint)endPoint controlPoint1:(CGPoint)controlPoint1 controlPoint2:(CGPoint)controlPoint2; //封闭路径 - (void)closePath; //添加新的路径 - (void)appendPath:(UIBezierPath *)bezierPath;
3. 渲染 1 2 3 //渲染 - (void)fill; - (void)stroke;
绘画的最后一步,它之于绘图的意义如画画的最后上颜料一样。
渲染分为两种方式:
1)填充Fill:将路径内部填充渲染
2)描边Stroke:不填充,只对路径进行渲染
4. 绘图状态栈 图形上下文包含一个绘图状态栈,默认为空。
1)保存图形状态时,将创建当前图形状态的一个副本并入栈。
2)还原图形状态时,将栈顶的图形状态推出栈并替换当前图形状态。
使用:调用CGContextSaveGState来保存,CGContextRestoreGState来还原。
(二)实操步骤 只需简单两步即可:
步骤一:新建一个类,继承UIView类。
步骤二:重载drawRect方法,在这个方法中进行绘图。
Tips:drawRect:方法会导致CPU飙升,原因是上下文的切换导致。谨慎使用
以自定义一个圆形View为例:
1)新建CircleView类,继承UIView类
2)在CircleView.m中重载drawRect方法
1 2 3 - (void)drawRect:(CGRect)rect { }
3)画一个圆
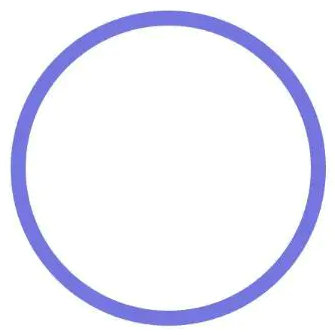
1 2 3 4 5 6 - (void)drawRect:(CGRect)rect { UIBezierPath * path = [UIBezierPath bezierPathWithOvalInRect:CGRectMake(100, 100, 200, 200)]; [[UIColor colorWithRed:0.5 green:0.5 blue:0.9 alpha:1.0] setStroke]; [path setLineWidth:10]; [path stroke]; }
4)创建CircleView的实例添加到视图中
1 2 3 4 5 - (void)viewDidLoad { [super viewDidLoad]; CircleView * cricleView = [[CircleView alloc]initWithFrame:self.view.bounds]; [self.view addSubview:cricleView]; }
5)效果图
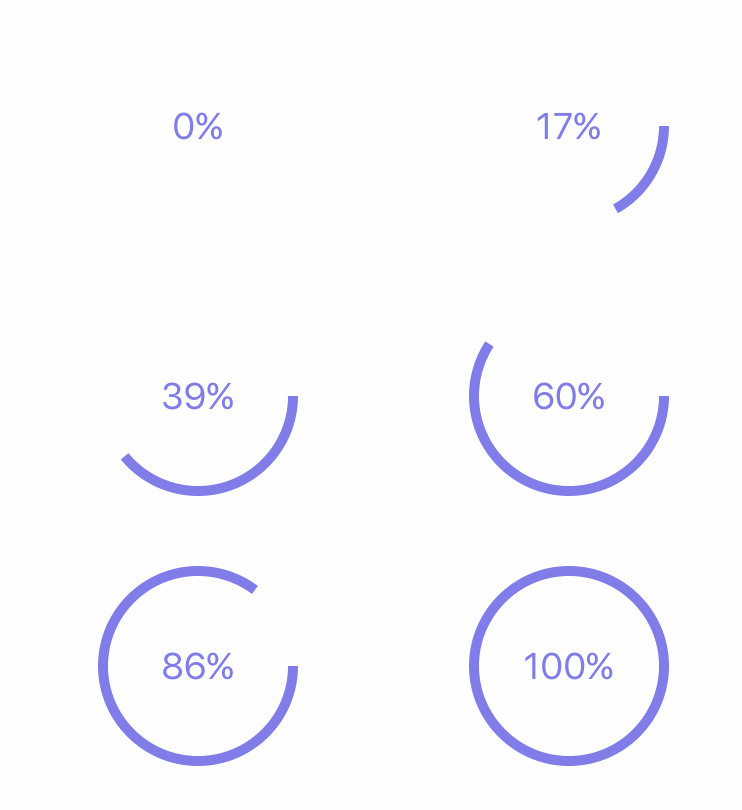
五、自定义动画 自定义View中讲到了如何在view里画一个圆,本文将在此基础上给其加上弧度变化的动画,形成一个简单的Loading动画,呈现自定义动画的实现过程。
先来看看需要实现的Loading动画效果:
(一)在UIView上实现 1、在自定义View时所提到的路径方法只能画整圆,现在我们使用下面的方法来画一部分圆弧:
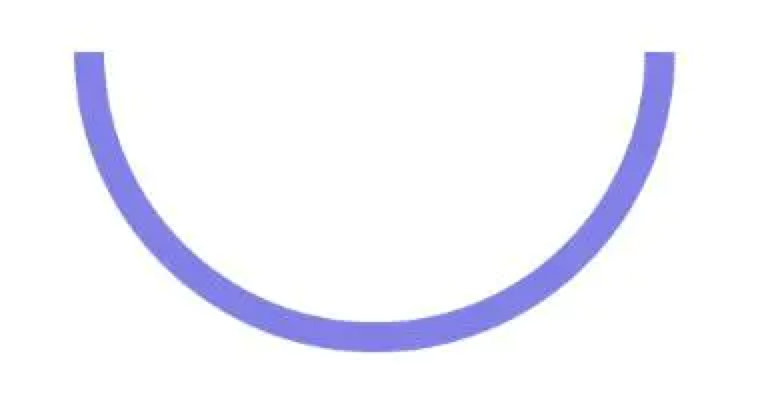
1 2 3 4 5 6 - (void)drawRect:(CGRect)rect { CGFloat radius = self.bounds.size.width / 2; CGFloat lineWidth = 10.0; UIBezierPath * path = [UIBezierPath bezierPathWithArcCenter:CGPointMake(radius, radius) radius:radius - lineWidth / 2 startAngle:0.f endAngle:M_PI clockwise:YES]; [[UIColor colorWithRed:0.5 green:0.5 blue:0.9 alpha:1.0] setStroke]; [path setLineWidth:lineWidth]; [path stroke]; }
效果:半个圆弧
2、弧度总不能写死吧,弧度得有变化才能形成动画效果。怎样控制它变化呢,我们给它加上一个progress属性来控制其弧度
1 2 3 @interface CircleProgressView : UIView @property (nonatomic, assign) CGFloat progress; @end
1
2
3
4
5
6
7
8
- (void)drawRect:(CGRect)rect { CGFloat radius = self.bounds.size.width / 2; CGFloat lineWidth = 10.0; UIBezierPath * path = [UIBezierPath bezierPathWithArcCenter:CGPointMake(radius, radius) radius:radius - lineWidth / 2 startAngle:0.f endAngle:M_PI * 2 * self.progress clockwise:YES]; [[UIColor colorWithRed:0.5 green:0.5 blue:0.9 alpha:1.0] setStroke]; [path setLineWidth:lineWidth]; [path stroke]; }
3、加到视图上
1 2 3 4 5 6 - (void)viewDidLoad { [super viewDidLoad]; self.circleProgressView = [[CircleProgressView alloc]initWithFrame:CGRectMake(100, 100, 200, 200)]; self.circleProgressView.progress = 0.2; [self.view addSubview:self.circleProgressView]; }
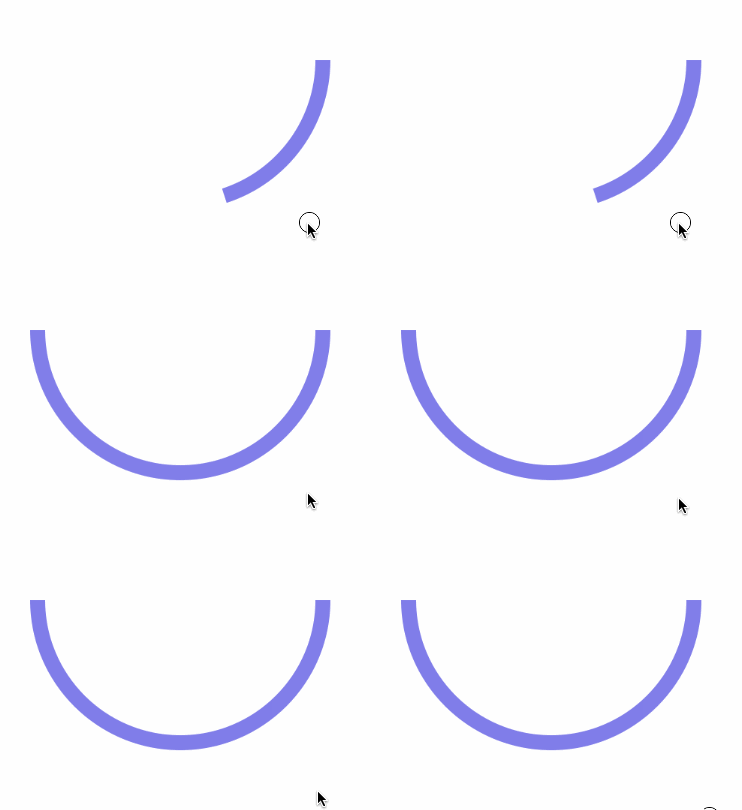
4、通过外部事件来改变它的弧度,并让其重绘(这里的例子时当点击屏幕的时候改变其弧度属性)
1 2 3 4 - (void)touchesBegan:(NSSet<UITouch *> *)touches withEvent:(UIEvent *)event { self.circleProgressView.progress = 0.5; [self.circleProgressView setNeedsDisplay]; }
效果图:
小结:
(二)更优雅的实现方式:在CALayer上实现 通过重载View的drawRect来实现自定义动画纵然可以,但是不够优雅(逼格),而且实现更复杂的界面时也显得不够方便,下面我们使用添加Layer的方式来实现。
1、新建CircleProgressLayer类
1 2 CircleProgressView.h CircleProgressView.m
2、给其添加progress属性
1 2 3 @interface CircleProgressLayer : CALayer @property (nonatomic, assign) CGFloat progress; @end
3、重载其绘图方法 drawInContext,并在progress属性变化时让其重绘
1 2 3 4 5 6 7 8 9 - (void)drawInContext:(CGContextRef)ctx { CGFloat radius = self.bounds.size.width / 2; CGFloat lineWidth = 10.0; UIBezierPath * path = [UIBezierPath bezierPathWithArcCenter:CGPointMake(radius, radius) radius:radius - lineWidth / 2 startAngle:0.f endAngle:M_PI * 2 * self.progress clockwise:YES]; CGContextSetRGBStrokeColor(ctx, 0.5, 0.5, 0.9, 1.0);//笔颜色 CGContextSetLineWidth(ctx, 10);//线条宽度 CGContextAddPath(ctx, path.CGPath); CGContextStrokePath(ctx); }
1 2 3 4 - (void)setProgress:(CGFloat)progress { _progress = progress; [self setNeedsDisplay]; }
4、将layer添加到自定义的view中,并在progress属性变化时通知layer
1 2 3 4 5 6 7 8 9 10 - (id)initWithFrame:(CGRect)frame { self = [super initWithFrame:frame]; if (self) { self.circleProgressLayer = [CircleProgressLayer layer]; self.circleProgressLayer.frame = self.bounds; //像素大小比例 self.circleProgressLayer.contentsScale = [UIScreen mainScreen].scale; [self.layer addSublayer:self.circleProgressLayer]; } return self; }
1 2 3 4 - (void)setProgress:(CGFloat)progress { self.circleProgressLayer.progress = progress; _progress = progress; }
这样做可以达到跟上面例子一样的效果,那么为什么推荐使用这种方式呢?
答案是:CALayer自带动画效果(或者说自带自动形成关键帧的天赋-隐式动画的功劳)
1)直接在View中绘图可以形成动画效果,但前提是其变化幅度要求非常小,否则看起来就是一段一段的很生硬,比如上面的例子中,progress从0.2变化到0.5的时候,并没有动画效果。
2)对比起来在CALayer中绘图可以使用CA动画让其自定义的属性变化也有动画效果,其原理是:给Layer的属性提供初值、终值和动画时间,CA会自动计算中间值,并生产关键帧,在非主线程中播放关键帧,这样就形成了动画效果。
下面我们使用 CALayer 更进一步进行动画制作:
下面我们给创建的Layer添加动画效果:
新建CircleProgressLayer类
1 2 CircleProgressLayer.h CircleProgressLayer.m
给其添加progress属性
1 2 3 @interface CircleProgressLayer : CALayer @property (nonatomic, assign) CGFloat progress; @end
重载其绘图方法 drawInContext,并在progress属性变化时让其重绘
1 2 3 4 5 6 7 8 9 - (void)drawInContext:(CGContextRef)ctx { CGFloat radius = self.bounds.size.width / 2; CGFloat lineWidth = 10.0; UIBezierPath * path = [UIBezierPath bezierPathWithArcCenter:CGPointMake(radius, radius) radius:radius - lineWidth / 2 startAngle:0.f endAngle:M_PI * 2 * self.progress clockwise:YES]; CGContextSetRGBStrokeColor(ctx, 0.5, 0.5, 0.9, 1.0);//笔颜色 CGContextSetLineWidth(ctx, 10);//线条宽度 CGContextAddPath(ctx, path.CGPath); CGContextStrokePath(ctx); }
重载 needsDisplayForKey方法指定progress属性变化时进行重绘
1 2 3 4 5 6 + (BOOL)needsDisplayForKey:(NSString *)key { if ([key isEqualToString:@"progress"]) { return YES; } return [super needsDisplayForKey:key]; }
5、重载initWithLayer方法
1 2 3 4 5 6 7 - (instancetype)initWithLayer:(CircleProgressLayer *)layer { NSLog(@"initLayer"); if (self = [super initWithLayer:layer]) { self.progress = layer.progress; } return self; }
6、在View中,当progress属性变化时,给对应layer增加CA动画,并在动画结束时刷新layer的progress属性
1 2 3 4 5 6 7 8 9 10 - (id)initWithFrame:(CGRect)frame { self = [super initWithFrame:frame]; if (self) { self.circleProgressLayer = [CircleProgressLayer layer]; self.circleProgressLayer.frame = self.bounds; //像素大小比例 self.circleProgressLayer.contentsScale = [UIScreen mainScreen].scale; [self.layer addSublayer:self.circleProgressLayer]; } return self; }
1 2 3 4 5 6 7 8 9 10 - (void)setProgress:(CGFloat)progress { CABasicAnimation * ani = [CABasicAnimation animationWithKeyPath:@"progress"]; ani.duration = 5.0 * fabs(progress - _progress); ani.toValue = @(progress); ani.removedOnCompletion = YES; ani.fillMode = kCAFillModeForwards; ani.delegate = self; [self.circleProgressLayer addAnimation:ani forKey:@"progressAni"]; _progress = progress; }
1 2 3 - (void)animationDidStop:(CAAnimation *)anim finished:(BOOL)flag { self.circleProgressLayer.progress = self.progress; }
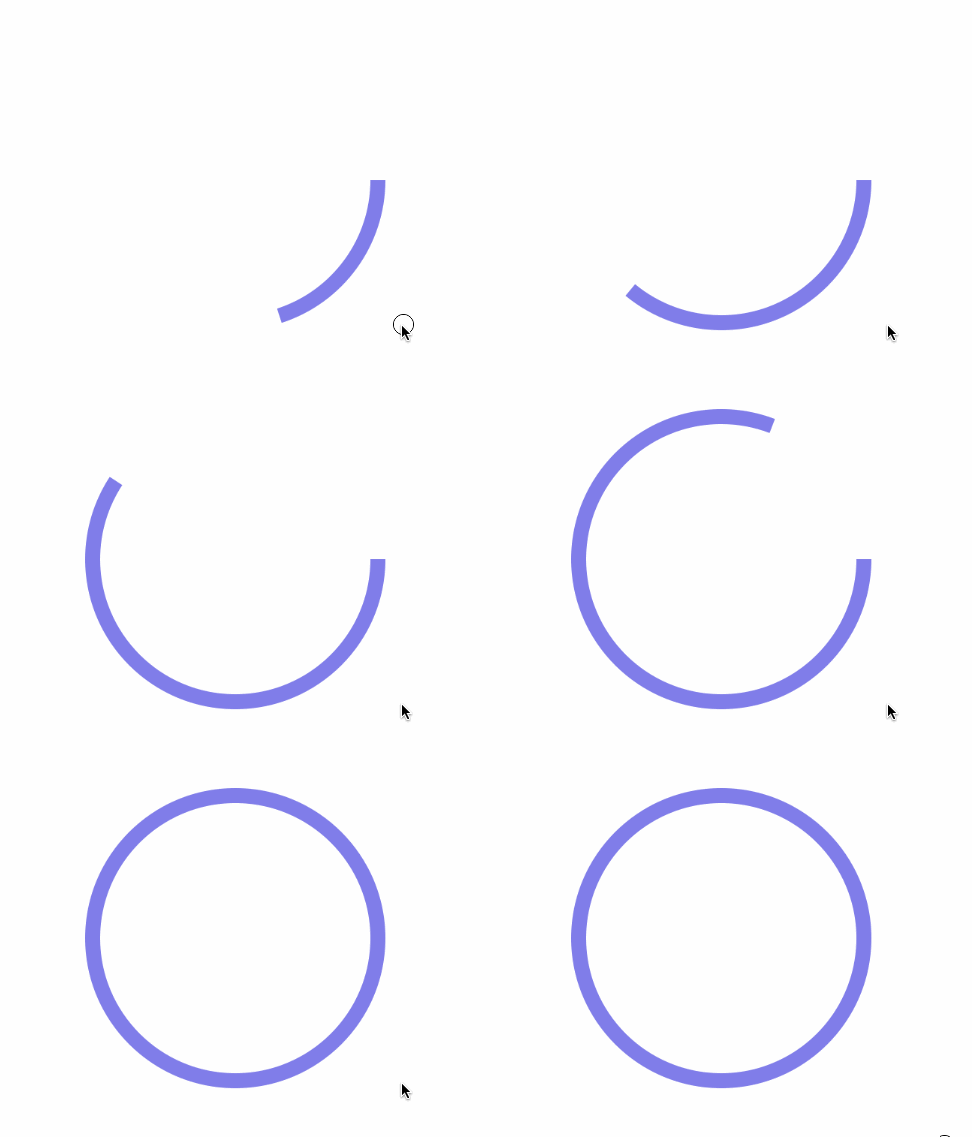
7、添加到视图中,通过外部事件改变其进度(这里的测试例子是当点击屏幕时随机增加进度)
1 2 3 - (void)touchesBegan:(NSSet<UITouch *> *)touches withEvent:(UIEvent *)event { self.circleProgressView.progress += (arc4random() % 4 + 1) * 0.1; }
效果图:
小结:
1)needsDisplayForKey方法:CA动画生成需要指定对Layer的哪一个属性进行插值,Layer默认有许多带有动画效果的属性,如postion,backgroundColor等等,我们自定义的属性需要手动指定。
2)initWithLayer方法:CA生成关键帧是通过拷贝CALayer进行的,在拷贝时,只能拷贝原有的(系统的,非自定义的)属性,不能拷贝自定义的属性或持有的对象等等,因此需要重载initWithLayer来手动拷贝我们需要拷贝的东西。
总结: 1)变化幅度小、变化速度快、回调频率高的情景,选用setNeedsDisplay进行重绘就可以满足需求。
应用场景:进度条的拖动(ges回调)、下拉刷新(scrollViewDidScroll回调)的动画等等
2)变化幅度大、变化速度慢、回调频率低的情景,选用给属性添加CA动画来满足需求。
应用场景:下载进度的变化、数字变化的效果
